How to Take Great Reference Photos for AI Headshots (That Actually Look Like You)
The quality of your AI headshots depends directly on the quality of your reference photos.
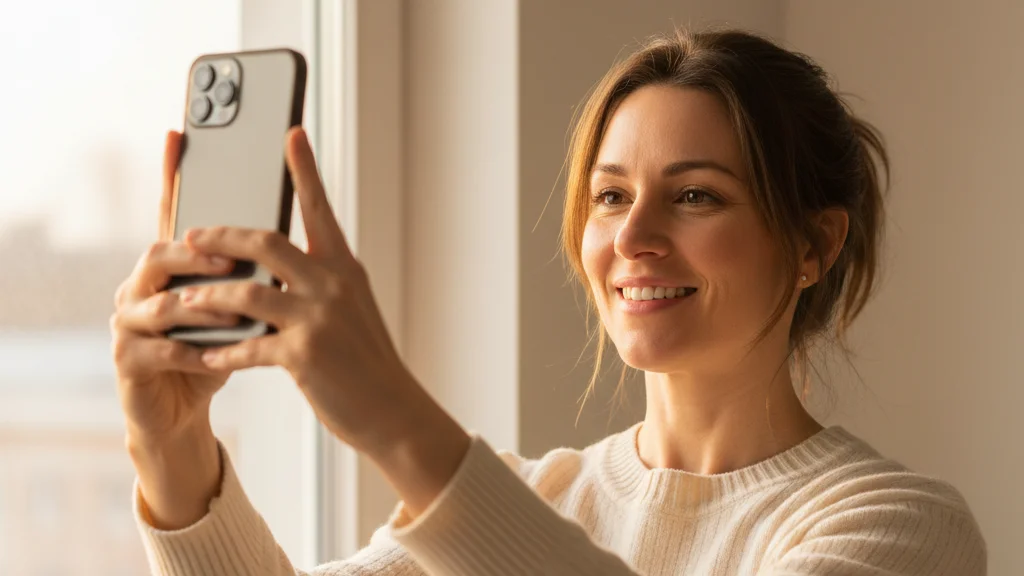
Upload blurry selfies with harsh shadows and your AI headshots will look like a polished version of someone who vaguely resembles you. Upload clear, well-lit photos that show your face properly — and the output will be unmistakably, accurately you.
This guide covers exactly what makes a good reference photo for AI headshot generators: lighting, angles, quantity, phone settings, and the common mistakes that tank output quality.
Why Reference Photos Matter More Than You Think
AI headshot generators work by training a model on your input images. The model learns your facial structure, features, skin tone, hair color, and characteristic traits — then uses that learning to generate you in professional headshot contexts.
The more accurate and varied your input, the better the model's understanding of you. The result: outputs that stay true to your face across different styles and lighting scenarios.
Low-quality inputs don't just produce low-quality outputs. They produce inaccurate outputs — photos that are technically professional but don't look quite right. An eye that's slightly too wide. A jawline that's sharper than it is. Skin that's smoother than yours.
The fix is almost always better reference photos.
How Many Reference Photos Do You Need?
Minimum: 1–5 photos Recommended: 10–15 photos Optimal: 15–20 photos
More photos give the model more signal. But more is only better if the photos are varied — 20 nearly identical selfies is worse than 10 photos with real variety in angle, lighting, and expression. HeadshotsByAI works great from just 1–5 casual photos, though 10–15 gives you the best identity accuracy.
The goal is to show the AI your face from multiple perspectives, in multiple lighting conditions, with natural variation in expression and setting.
The 5 Types of Reference Photos to Include
1. Straight-on, neutral expression
Your face looking directly into the camera, expression relaxed and natural. No forced smile, no exaggerated expression — just how you normally look.
This is the baseline. It gives the model your facial structure at its most readable.
How to take it:
- Camera at eye level (not below, not sharply above)
- Face centered in frame, head and shoulders visible
- Natural, relaxed expression — think "I just heard someone say my name across the room"
- Good even lighting (see lighting section below)
2. Slight left turn (3/4 angle)
Your face turned 20–30 degrees to the left, so the camera sees more of your right side. This is one of the most flattering angles for most people and gives the model depth information about your facial structure.
3. Slight right turn (3/4 angle)
Same as above, mirrored. Include both — your face has subtle asymmetries, and including both angles gives the model a complete picture.
4. Slight downward tilt
Face angled very slightly down — not chin-to-chest, just a natural 10–15 degree tilt. This is the angle most people naturally adopt in conversational photos and helps the AI handle headshots where you're not rigidly upright.
5. Natural smiling expression
One or two photos with a genuine smile — not a performance, just a natural, comfortable expression. Professional headshots often use a slight smile, and giving the model reference for your smiling face helps it produce more accurate outputs in those styles.
Lighting: The Single Biggest Factor
Lighting is responsible for more output quality variation than any other factor. Good lighting makes your features clear and consistent across photos. Bad lighting introduces noise that makes the model work harder — and makes your face look different from photo to photo.
What good lighting looks like
Soft natural window light is the gold standard:
- Stand near a window (not in direct sunlight — that creates harsh shadows)
- Position yourself so the light hits your face at roughly a 45-degree angle
- The light should illuminate your face evenly with no hard shadows falling across your nose, eyes, or cheeks
- Overcast days are ideal — the clouds act as a giant diffuser
Soft indoor artificial light:
- A lamp with a shade, positioned to your side and slightly in front
- Ring lights work well if not too close — the goal is even illumination, not the "ring in the eyes" look that signals a staged setup
- Two light sources facing you from different sides eliminates most shadows
What to avoid
Direct sunlight: Creates harsh, unflattering shadows that make your face look different from how it normally looks. Squinting also changes your eye appearance.
Single overhead light: The classic "unflattering bathroom light" problem. Shadows fall under your eyes, nose, and jawline — making you look different and making the model's job harder.
Dark or dim environments: Low light forces your camera to compensate — usually with noise, blur, or overexposed face against dark background. The AI needs to see your face clearly.
Mixed light sources: Being lit simultaneously by warm incandescent light and cool daylight creates color casts that affect skin tone in your reference photos.
Phone Camera Settings That Help
You don't need a professional camera. A modern phone camera is more than capable of producing excellent reference photos. A few settings worth adjusting:
Portrait mode: Use it if your phone has it. It creates a natural depth-of-field effect that keeps your face sharp and background softly blurred — making your features easier to read.
Front camera vs rear camera: The rear camera on most phones has a higher-quality sensor. For selfies where you can see yourself, the front camera is fine. For better technical quality, use the rear camera with a timer or ask someone to take the photo.
Don't over-apply beauty filters: Some phones and apps automatically smooth skin, enlarge eyes, or slim the face. These filters work against you — they're changing your appearance in ways that confuse the model. Turn off automatic beauty/retouching before taking reference photos.
HDR mode: Leave it on. HDR helps preserve detail in both highlights and shadows, which is exactly what you want for clear facial features.
Resolution: Don't compress or export at reduced quality before uploading. Use the native photo from your camera.
Backgrounds: What Works and What Doesn't
Your background matters less than you'd think — the AI is focused on your face, not what's behind you. But a few guidelines:
Good backgrounds:
- Plain walls (white, gray, beige, any solid neutral)
- Outdoors with natural greenery in soft focus
- Simple indoor environments that aren't cluttered or distracting
Avoid:
- Backgrounds with other faces in them (the model might get confused about which face is yours)
- Very busy or high-contrast patterns
- Backgrounds that are the same color as your hair or skin
What NOT to Include in Your Reference Photos
A few things that hurt output quality more than most people realize:
Sunglasses or prescription glasses on: Including some photos with glasses is fine, but include enough without them that the model has a clear view of your eyes. Eyes are one of the most identity-specific features — the model needs them.
Heavy shadow over part of your face: Even a small shadow cast across your eye or nose gives the model incomplete information about your features.
Hats with low brims: Similar issue — anything blocking part of your face reduces the model's accuracy.
Heavily filtered photos: If you've run a photo through a heavy Instagram or Snapchat filter, it's no longer an accurate representation of your face. Leave filters for your output photos — not your reference photos.
Group photos (even cropped): If you crop yourself out of a group photo, the compression artifacts and background context can reduce quality. Dedicated solo photos are better.
Very old photos: If your appearance has changed significantly — hair color, facial hair, weight — old photos will confuse the model about what you currently look like. Use photos from the last 6–12 months.
The Quick Reference Checklist
Before you upload, run through this:
- 1–5 photos minimum (10–15 recommended for best results)
- Multiple angles: straight on, slight left, slight right
- Good, even lighting — no harsh shadows across face
- Eyes clearly visible in most photos
- No heavy filters or beauty retouching applied
- No sunglasses; limited hat/hair blocking face
- Photos from the last 6–12 months (current appearance)
- Varied expressions: neutral, slight smile
- High resolution — not compressed exports
- Mix of indoor and outdoor if possible
A Simple Setup That Works Every Time
You don't need to over-engineer this. Here's a setup that produces excellent reference photos with whatever you have:
- Find a window in your home or office — any standard window works
- Stand facing the window (so the light falls on your face, not behind you)
- Take photos in the late morning or early afternoon on an overcast day, or any time when direct sun isn't hitting the window
- Use your phone's portrait mode and timer function if available
- Shoot 10–15 photos across the angles described above
That's it. Twenty minutes, no equipment, excellent reference photos.
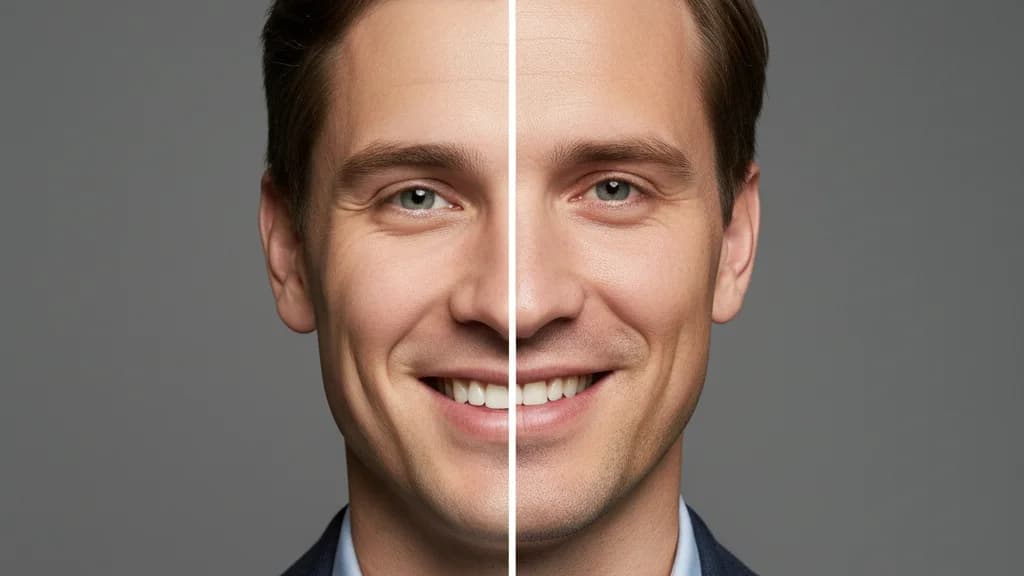
How Good Reference Photos Change Your Results
The difference is visible. A set of well-lit, varied reference photos typically produces:
- Higher identity consistency across styles — every output looks like you
- Better detail preservation in eyes, skin texture, and hair
- More usable photos per batch — less culling required
- Accurate skin tone across different lighting scenarios in the output
It's the highest-leverage thing you can do before generating your AI headshots. The tool does the rest.
Ready to put this into practice? Upload your photos to HeadshotsByAI →
Related:
Ready to create your professional headshots?
Join thousands of professionals who have already transformed their online presence with AI-powered headshots.
Continue Reading

Best AI Headshot Generator Tips for Perfect Results
Master the art of AI headshot generation with expert tips on photo selection, lighting, wardrobe, and common mistakes to avoid. Learn exactly what makes the difference between mediocre and outstanding AI-generated professional headshots.

AI Headshots in 2026: How to Get Professional Results That Actually Look Like You
Most AI headshot tools give you a professional photo. Not your photo. This guide covers why identity drift happens, how to avoid it, and how to get results that actually look like you.
AI Headshots vs Traditional Photography in 2026: An Honest Comparison
Cost, speed, quality, identity preservation — an honest breakdown of AI headshots vs a traditional photographer in 2026, with clear guidance on which is right for your situation.